 Below are various drawings, photographs and notes I have made in class or by researching into techniques and rules that I will be using in the future when completing briefs and projects for coursework or otherwise.
To the left is an image showing the notes I made in class featuring; an Extreme close up (ECU), Close up (CU) , Medium close up (MCU), Medium shot (MS), 3/4 shot, Medium long shot (MLS), and an Establishing shot (EST).

 I have taken my knowledge from the classroom and have produced various photographs showing the camera angle and have also researched into the angle used.
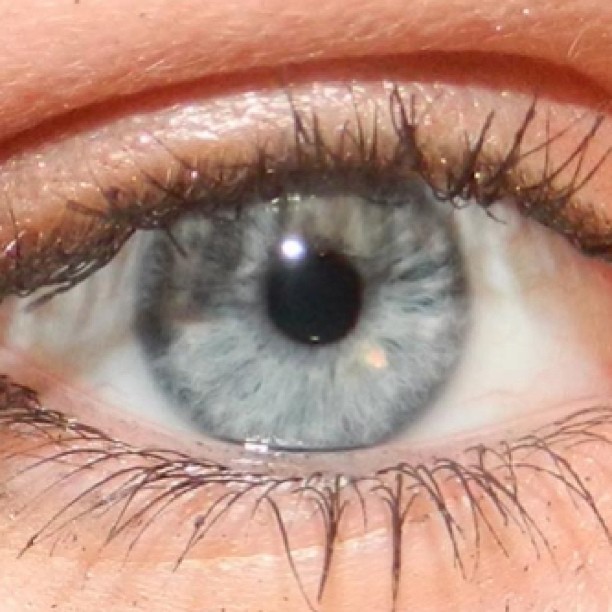
Various types of close up's: "Extreme Close Up ("ECU" or "XCU"): The shot is so tight that only a detail of the subject, such as someone's eyes, can be seen." The shot to the right is an extreme close up (ECU) of a female, you are able to see her facial reaction extremely well in this shot. I have also taken an extreme close up of an eye, this could be important to a story if for example the film was called "Behind Blue Eyes."
 A Close Up: "Close Up ("CU"): A certain feature, such as someone's head, takes up the whole frame. Close-ups are often used as cutaways from a more distant shot to show detail, such as characters' emotions, or some intricate activity with their hands." To the right you can see I have taken a photograph showing the facial reaction of a female, although you also have an idea of her location and her costume.
  Medium Close Up: "Medium Close Up ("MCU"): Half-way between a mid shot and a close-up. Usually covers the subject's head and shoulders." To the left is an image of a young girl, you can see more of the location and costume in the frame which could indicate that her body movements are more important. You can also see she is standing in a park of some kind and is dressed casually so it could be a weekend or it could suggest she is a teenager.
The photograph to the right is an example of a 3/4 shot. It shows slightly more of the location and body of the character more then in a medium close up however you are still able to see the females facial reaction better then in a long shot.
 Long Shot: "A Long Shot (LS) (sometimes referred to as a full shot or a wide shot) typically shows the entire object or human figure and is usually intended to place it in some relation to its surroundings." This photograph to the left is an example of a long shot, you are able to see the whole figure of the female clearly and the location she is in.
Establishing shot: "An establishing shot in filmmaking and television production sets up, or establishes the context for a scene by showing the relationship between its important figures and objects. It is generally a long- or extreme-long shot at the beginning of a scene indicating where, and sometimes when, the remainder of the scene takes place." The photograph to the right is an example of an establishing shot, it shows the location and indicated the jump in time.
 Rule of thirds: "The rule of thirds is a guideline which applies to the process of composing visual images. The guideline proposes that an image should be imagined as divided into nine equal parts by two equally-spaced horizontal lines and two equally-spaced vertical lines, and that important compositional elements should be placed along these lines or their intersections. Proponents of the technique claim that aligning a subject with these points creates more tension, energy and interest in the composition than simply centering the subject would." The image to the left you can see has been split into nine equal parts with a main focus point - in this case a female, which creates more interest to the main focus point instead of noticing other objects in the frame.
 Here are some of the notes from class I took. The image on the left shows us focusing on continuity and jump cuts as well as how to draw figures when story boarding and how to position them correctly. I shall be using this information in the future when I shall be drawing our storyboards as well as when we edit our project on the editing suite.
 The image on the right however explains how to use the rule of thirds and how to position your character when storyboarding and later on filming. It also shows how you could draw your character sitting on a chair showing various body parts instead of a stick man.
 The image to the left explains shot reverse shot and aerial views, this will be useful when story boarding or writing a conversation between two people in a script so we have an idea of how it should correctly be done. This will be helpful in the future when it comes to filming as our group will have an idea of how we should correctly carry out the shot.
No comments:
Post a Comment