Tuesday, 22 November 2011

Post 8: Pre-production report

When it came to filming it wasn't a great start, the day we were asked to film our location (the library) was unavailable due to a class using the facility, we decided that it wouldn't be worth filming due to background noise and unwanted people which could effect the continuity in the frame so we re-arranged the date of filming to Tuesday 11th October. However when there we did notice that it was occupied by a student and a teacher having a meeting but we started to film hoping things would work, we soon  realized they were to close and the camera was picking up their voices so we kindly asked them to move slightly further away and then filming seemed to run smoothly.

The filming went quite well overall we managed to produce all the needed shots that we had originally discussed in a limited amount of time and luckily we didn't need to go back and film any extras. There were a few mistakes during filming such as during the extreme close up for Charley we had to film a few times to get it exactly right especially due to her make-up  also when Charley was walking towards Bobbi we did have a slight continuity error but we couldn't quite get the right take. Whilst filming we also had a countdown to three and a clapper board, this giving us time to get into character and also when it came to editing we had time on each end of the clip to edit. 
There were many reasons why overall the filming went well one of the reasons I believe was because of how we worked well as a team and were therefore organised as we split the duties between us, this making us be prepared for filming I believe if we hadn't worked well then it would have taken longer to film. We made sure to take our time when filming trying to stick to the storyboard as much as possible, the shot list helped us make sure we filmed the appropriate shot this meant we wouldn't have to spend extra time re-filming. Working well as a team was important and the main thing we always did was communicate, if someone didn't understand or if they needed help then we always helped each other out.
I believe the footage we shot was very good although there were obviously some changes that could have been made such as the camera moved making the scene jump and we unfortunately only realised this at the end after we had edited so there was not enough time to go back and change it. Another error we only unfortunately realised at the end was when Charley runs out of the room, there appears to be a jump cut that we didn't want, this mistake should have been redone but of course we ran out of time. We tried the best to our abilities to edit these mistakes so that it flows better, when it came to the editing suite we had no problems and we did address the mistakes which next time we film we will make sure to not make the same mistakes again as we don’t want unplanned jump cuts. I think we did complete the continuity task well as there are no dramatic time laps and when it came to shot reverse shot we made sure to keep in line with the 180 degree rule, overall we did complete the task well.

Tuesday, 8 November 2011

Post 7: Additional Pre-Production Documentation

Location Recce: The main location of our project will be inside and outside of the school's library. 


Risk assessment
Risk assessments are important so we are able to identify possible risks whilst in the process of filming, this makes everyone cautious whilst on set. There is the obvious risk of not knowing what to do if a fire was to happen, so we made sure everyone was aware of the two possible fire exits if the fire alarm was to disrupt filming.

The carpet by the door
Coming into the library there is a large mat on the floor, this is a possible hazard as one of us could trip over it especially Charley who will be having to run out of the door. This could lead to broken equipment or an injury with an actor. Overcoming this hazard is easy by simply making sure the mat is stuck down onto the floor correctly and by making everyone away of it's existence.

There are also lose wires and open sockets around the library which is a hazard as one of the cast or crew could trip over it if not careful. To avoid any accidents we should make sure they are put away if possible  or tapped down. 

The chair and table leg's.
Whilst we are filming we could possibly trip over a chair or table leg, especially Bobbi or Charley who get up from the table and leave. The way to stop this from happening is to get the actors to practice getting up and down from the chairs and placing them so that they don't have to move them when they leave.

The tripod not being set up correctly could cause the camera to fall during filming. This can be stopped by making sure the tripod and camera are secure when filming and making sure that whoever is in charge of the camera at that point in time knows how to set it up properly.


Shooting schedule

Day.
Period.
Start time.
Scene.
Shot.
Tuesday 11th October 2011

Afterschool
3:15
1 and 2
All shots completed.

Mise-En-Scene Description

Set design/Location.
For our preliminary task we have been set the continuity task which we decided to film in the library and one of the hallway's in our school. The reason for our choice in setting was it was very realistic as for our task we have chosen to do a short clip about three girls attending sixth form who are living there normal life. Therefore the library achieves the idea of a realistic and real school. We will not need to change any of the mie-en-scene as we will be surrounded by books. The library is very large and there is enough room for filming. There also are desks in the library which we aim to be using along with the chairs.   

Props
During our filming we will use a letter, a desk with books, paper and pens on, three chairs place around the table for each girl. These props all help us create the feeling of three girls studying in a library. We also made sure to keep the continuity by taping down the props.

Lighting
The library has natural light, and there are numerous small windows around the library that regularly give light and also a door that will give us natural lighting from the corridor. There is also artificial lighting from numerous lights on the ceiling that we plan to use if the natural light isn’t bright enough.

Character movement
At the beginning of the filming, Charley will be standing outside the corridor holding a letter; she will then walk into the library. Bobbi will see Charley and calls her over then Bobbi will leave Katie-Mai and Charley remain at the table and argue. Charley then runs out and slams the door, when then will cut to credits.We have chosen this movement as it is very realistic to what teenage girls would do and how they would behave.

Props
During our filming we will use a letter, a desk with books, paper and pens on, three chairs place around the table for each girl. These props all help us create the feeling of three girls studying in a library. To also make sure the continuity is kept we made sure to tape down the props.

Costume
Taylor: We didn't want her to stand out too much so we made her a tomboy in comparison to Alice's 'girly' image and Chantelle 'chav' stereotype, there was no make-up needed for this character and overall the character's image worked well when filming.

Alice: We wanted her to look sweet and fun and natural in comparison to Charley's character Chantelle I believe this did work as there was an obvious contrast between characters and the outfit worked well with the character.
Chantelle: We tried to keep it in the stereotype of a 'chav' and with her make-up we believe we did create a realistic look for her character. 

Hair and make-up
Bobbi: Hair: Tied up      Make-up: N/A
Katie-Mai: Hair: straightened down     Make-up: natural
Charley:Hair: Tied up    Make-up: "Fake" stereotypical Essex.

Tuesday, 18 October 2011

Post 6: Shot list and storyboard

Shot list


Shot
Description
Shot size
1

Charley is standing outside the library, holding her stomach looking upset and staring at the piece of paper she is holding.We want this shot because we want Charley to appear vulnerable. 
High angel
Medium long shot (MLS)
2
Charley walks into the library.
The reason behind this shot was so you  get an idea about the location she was in.
Long shot (LS)
3
Bobbi spots Charley and waves at her and calls her over. We used a medium long shot so the audience can see both Charley and Bobbi in the shot and so you are able to see what's taking place around them.
Medium long shot (MLS)
4

Charley, Katie and Bobbi all sat at the table together, this sets the scene of where the conversations are going to take place. A medium shot will be used so emotions and body language can still be seen but so you can also see everyone in the frame.
Medium shot (MS)
5

Bobbi comforts Charley, says bye to them both then walks off out of the shot so that it’s just Katie and Charley left at the table.We will use a medium long shot so you see her walking off set and see Charley's reaction to her leaving.
Medium close up (MCU)
6

Charley starts crying as she is becoming more and more upset as she knows she has to tell Katie the news. We will use an extreme close up to show Charley crying.
Extreme Close up (ECU)
7
Katie keeps asking why Charley is upset. We will have a close up on Katie’s facial expression to show her confusion and hurt to Charley's blunt behaviour.
Close up (CU)
8
Charley tells Katie she is pregnant with Katie's boyfriend's baby. We will use a close up to show her running make-up and how much it hurts her to admit the truth.
Close up (CU)
9
Katie gets angry and slams her hands on the table. We will use a medium close up to show her facial expression and her hands so you can see the anger she holds for Charley.
Medium close up
10
Charley repeatedly says sorry trying to calm Katie down. We will use a medium close up to show her facial expressions and body movement.
Medium shot (MS)
11
Katie tells Charley to get out. A medium shot will help us show Katie body movement of her pointing towards the door and her emotion.
Medium shot (MS)
12
This shot is Charley walking out a ¾ shot will show the location and also the door will be visible. 
¾ shot
13
In this final shot we will have Charley slamming the door a medium shot shows Charley walking out.
Medium long shot (MLS)


Storyboard


Post 5: Jump cuts, Over the shoulder shots, Cutaways and Point of view shots.

Jump cut: "A jump cut is a cut in film editing in which two sequential shots of the same subject are taken from camera positions that vary only slightly. This type of edit causes the subject of the shots to appear to "jump" position in a discontinuous way. For this reason, jump cuts are considered a violation of classical continuity editing, which aims to give the appearance of continuous time and space in the story-world by de-emphasizing editing. Jump cuts, in contrast, draw attention to the constructed nature of the film." A Jump Cut is an immediate transition from one scene to another. 


Over the shoulder shot: "Over the shoulder shot is a shot of someone or something taken from the perspective or camera angle from the shoulder of another person. The back of the shoulder and head of this person is used to frame the image of whatever (or whomever) the camera is pointing toward." An over the shoulder shot is a shot of something or someone from over a different persons shoulder.


Cutaway: "A Cutaway shot is the interruption of a continuously filmed action by inserting a view of something else.It is usually, although not always, followed by a cut back to the first shot, when the cutaway avoids a jump cut. The cutaway shot does not necessarily contribute any dramatic content of its own, but is used to help the editor assemble a longer sequence.For this reason, editors choose cutaway shots related to the main action, such as another action or object in the same location.For example, if the main shot is of a man walking down an alley, possible cutaways may include a shot of a cat on a nearby bin or a shot of a person watching from a window overhead." A Cutaway is when a camera cuts away from the main action to show something else before cutting back. 


Point of view shot: "A point of view shot ( POV) is a short film scene that shows what a character is looking at. It is usually established by being positioned between a shot of a character looking at something, and a shot showing the character's reaction. The technique of POV is one of the foundations of film editing." A point of view shot allows the audience to see through the characters eyes and see what has grabbed the characters attention.

Thursday, 6 October 2011

Post 4: Script

Below are two images which shows our groups script, everyone contributed to the script and we all believe we have a strong idea. We have annotated several points to identify how we would keep the continuity, show the different character movements and the point to why certain dialogue was being said. 

Wednesday, 5 October 2011

Post 3: Continuity

Continuity: "Continuity is particularly a concern in the production of film and television due to the difficulty of rectifying an error in continuity after shooting has wrapped up." Continuity is when you keep the consistency throughout the shot, this often effects the mise-en-scene the most as the audience can often tell if a character has changed their costume or a prop is no longer where it originally was. 


Below are two photographs that show how continuity is broken, the pens have been moved from the shot and you cannot see them in the next. This is an example of bad and broken continuity that my group and I should be careful of when filming.


Broken Continuity. 


180 degree rule: "In film making, the 180-degree rule is a basic guideline regarding the on-screen spatial relationship between a character and another character or object within a scene. An imaginary line called the axis connects the characters and by keeping the camera on one side of this axis for every shot in the scene, the first character will always be frame right of the second character, who is then always frame left of the first. If the camera passes over the axis, it is called jumping the line or crossing the line." To the left is a photograph explaining the crossing line and how to keep within the basic 180 degree rule, this will be helpful to my group and I when it comes to filming our project for the brief. To the right is an example of how the 180 degree rule would be put into practice, the image shows it being used correctly as well as an example of the 180 degree rule being broken.


Shot reverse shot: "Shot reverse shot is a film technique where one character is shown looking at another character (often off-screen), and then the other character is shown looking back at the first character. Since the characters are shown facing in opposite directions, the viewer assumes that they are looking at each other." Shot reverse shot is when a camera shows one character looking at another, followed by the camera showing the second character looking back to the first. Below is a demonstration of shot reverse shot between two characters.


Match on action: "Cutting on action or matching on action refers to film editing and video editing techniques where the editor cuts from one shot to another view that matches the first shot's action.Although the two shots may have actually been shot hours apart from each other, cutting on action gives the impression of continuous time when watching the edited film. By having a subject begin an action in one shot and carry it through to completion in the next, the editor creates a visual bridge, which distracts the viewer from noticing the cut or noticing any slight continuity error between the two shots." Match on action is when editors show one action shot then cut over to another different view which matches the first shot's action.

Friday, 23 September 2011

Post 2: Storyboard, Shot sizes and Framing

Below are various drawings, photographs and notes I have made in class or by researching into techniques and rules that I will be using in the future when completing briefs and projects for coursework or otherwise.

To the left is an image showing the notes I made in class featuring; an Extreme close up (ECU), Close up (CU) , Medium close up (MCU), Medium shot (MS), 3/4 shot, Medium long shot (MLS), and an Establishing shot (EST). 


I have taken my knowledge from the classroom and have produced various photographs showing the camera angle and have also researched into the angle used.

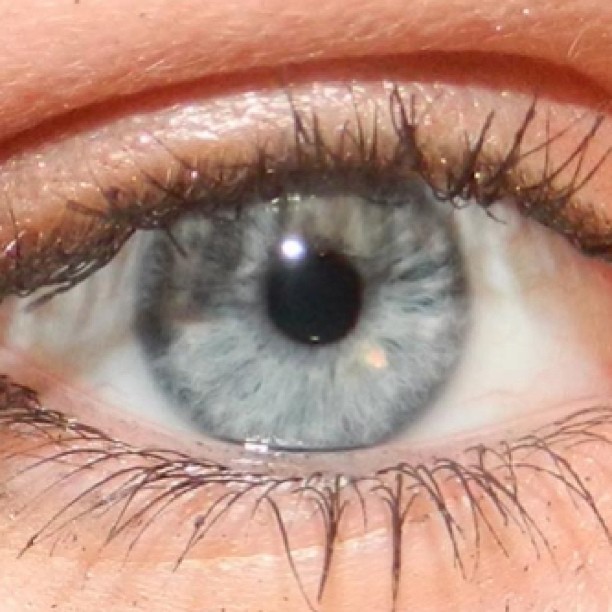
Various types of close up's: "Extreme Close Up ("ECU" or "XCU"): The shot is so tight that only a detail of the subject, such as someone's eyes, can be seen." The shot to the right is an extreme close up (ECU) of a female, you are able to see her facial reaction extremely well in this shot. I have also taken an extreme close up of an eye, this could be important to a story if for example the film was called "Behind Blue Eyes." 

A Close Up: "Close Up ("CU"): A certain feature, such as someone's head, takes up the whole frame. Close-ups are often used as cutaways from a more distant shot to show detail, such as characters' emotions, or some intricate activity with their hands." To the right you can see I have taken a photograph showing the facial reaction of a female, although you also have an idea of her location and her costume. 
Medium Close Up: "Medium Close Up ("MCU"): Half-way between a mid shot and a close-up. Usually covers the subject's head and shoulders." To the left is an image of a young girl, you can see more of the location and costume in the frame which could indicate that her body movements are more important. You can also see she is standing in a park of some kind and is dressed casually so it could be a weekend or it could suggest she is a teenager. 

The photograph to the right is an example of a 3/4 shot. It shows slightly more of the location and body of the character more then in a medium close up however you are still able to see the females facial reaction better then in a long shot.


Long Shot: "A Long Shot (LS) (sometimes referred to as a full shot or a wide shot) typically shows the entire object or human figure and is usually intended to place it in some relation to its surroundings." This photograph to the left is an example of a long shot, you are able to see the whole figure of the female clearly and the location she is in. 

Establishing shot: "An establishing shot in filmmaking and television production sets up, or establishes the context for a scene by showing the relationship between its important figures and objects. It is generally a long- or extreme-long shot at the beginning of a scene indicating where, and sometimes when, the remainder of the scene takes place." The photograph to the right is an example of an establishing shot, it shows the location and indicated the jump in time. 

Rule of thirds: "The rule of thirds is a guideline which applies to the process of composing visual images. The guideline proposes that an image should be imagined as divided into nine equal parts by two equally-spaced horizontal lines and two equally-spaced vertical lines, and that important compositional elements should be placed along these lines or their intersections. Proponents of the technique claim that aligning a subject with these points creates more tension, energy and interest in the composition than simply centering the subject would." The image to the left you can see has been split into nine equal parts with a main focus point - in this case a female, which creates more interest to the main focus point instead of noticing other objects in the frame. 

Here are some of the notes from class I took. The image on the left shows us  focusing on continuity and jump cuts as well as how to draw figures when story boarding and how to position them correctly. I shall be using this information in the future when I shall be drawing our storyboards as well as when we edit our project on the editing suite. 

The image on the right however explains how to use the rule of thirds and how to position your character when storyboarding and later on filming. It also shows how you could draw your character sitting on a chair showing various body parts instead of a stick man.

The image to the left explains shot reverse shot and aerial views, this will be useful when story boarding or writing a conversation between two people in a script so we have an idea of how it should correctly be done.  This will be helpful in the future when it comes to filming as our group will have an idea of how we should correctly carry out the shot.